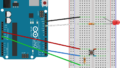

配線図
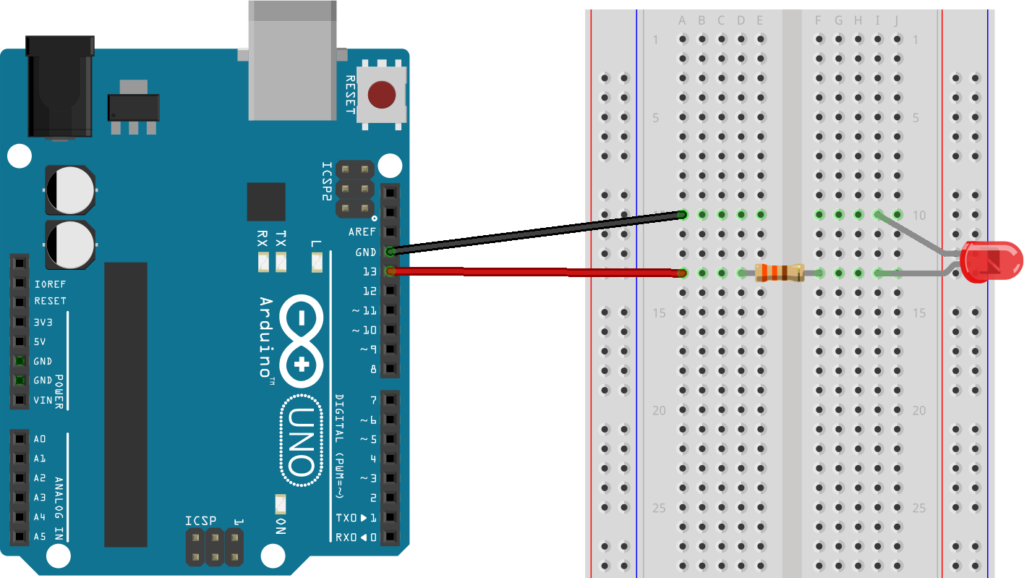
この回路図の作図には fritzing を利用させて頂いております。https://fritzing.org/home/
使用部品
- LED
- 抵抗 330Ω
- ジャンプワイヤー
Arduino IDE
「ファイル」>「スケッチ例」>「01Basics」>「Blink」を選択。
- /*
- Blink
- Turns an LED on for one second, then off for one second, repeatedly.
- Most Arduinos have an on-board LED you can control. On the UNO, MEGA and ZERO
- it is attached to digital pin 13, on MKR1000 on pin 6. LED_BUILTIN is set to
- the correct LED pin independent of which board is used.
- If you want to know what pin the on-board LED is connected to on your Arduino
- model, check the Technical Specs of your board at:
- https://www.arduino.cc/en/Main/Products
- modified 8 May 2014
- by Scott Fitzgerald
- modified 2 Sep 2016
- by Arturo Guadalupi
- modified 8 Sep 2016
- by Colby Newman
- This example code is in the public domain.
- https://www.arduino.cc/en/Tutorial/BuiltInExamples/Blink
- */
- // the setup function runs once when you press reset or power the board
- void setup() {
- // initialize digital pin LED_BUILTIN as an output.
- pinMode(LED_BUILTIN, OUTPUT);
- }
- // the loop function runs over and over again forever
- void loop() {
- digitalWrite(LED_BUILTIN, HIGH); // turn the LED on (HIGH is the voltage level)
- delay(1000); // wait for a second
- digitalWrite(LED_BUILTIN, LOW); // turn the LED off by making the voltage LOW
- delay(1000); // wait for a second
- }
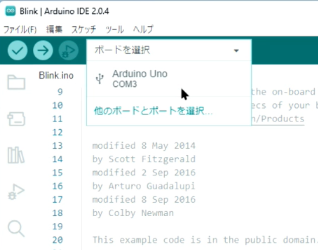
「ボードを選択」から「Arduino Uno / COM3」を選択。
「書き込みボタン」を押して、Errorが表示されなければ完了。